It can be difficult pet proofing or baby proofing your house. Although you may let your dog or toddler have some free range of the home, there are certain areas you want blocked off for their safety (or for the safety of your floors).
Safety Gate
Safety Gate
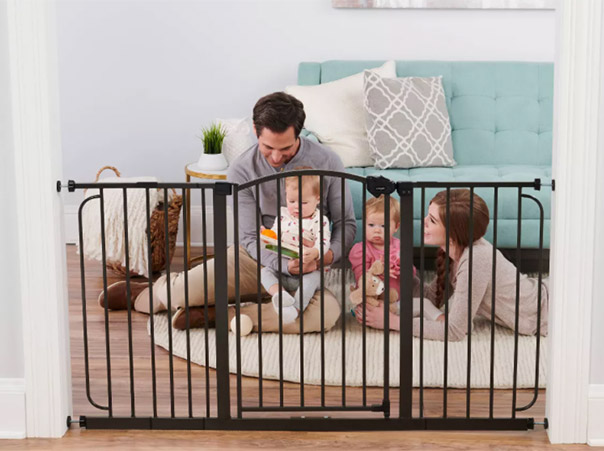
There’s all kinds of them out there now – some short, some tall, some super wide, and some are even kind of decorative. They typically slide in between two walls or door trims and are held in place with it’s own tension pressure, there’s always some sort of child-proof lock to release in order to swing the gate open and then it locks back into place when shut closed. You can place the gate at the top of the stairs, in the hallway, or in an open doorway to restrict your little one to a particular room while still being able to monitor them.
With Cat Door
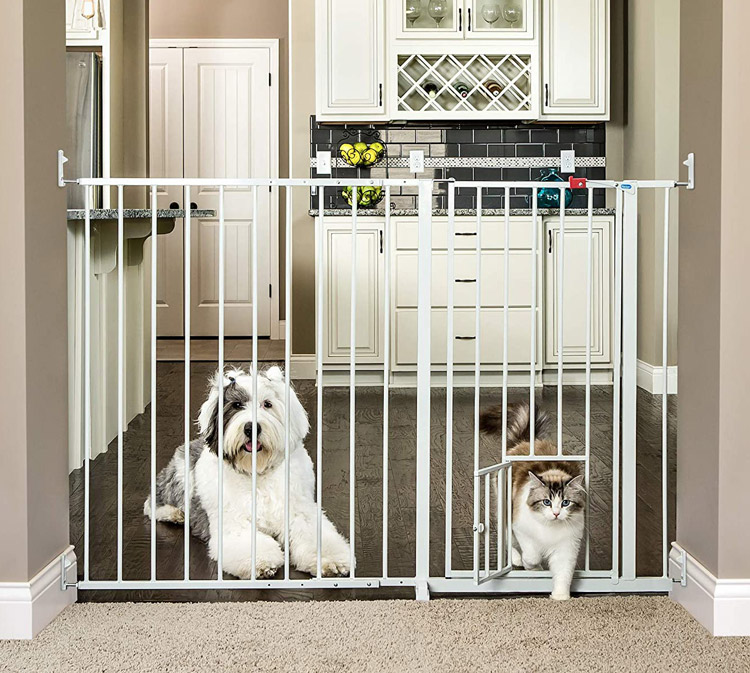
These gates usually work great…. unless you have a combination of cats and dogs. Your current gate might be good for preventing your small child from wandering out, but then it inadvertently prevents your cat from going to areas he should be allowed to access like the living room or backyard. Well, turns out gate designers have already thought of that too. A lot of safety gates now have a cat door option – a little opening at the bottom where cats can get through but is too small for most dogs to crawl through.
So what’s the problem? Well, it can get a little more complicated when you have dogs and cats of the same size. That was our case living with two 12 pound cats and 3 small dogs at 12, 8, and 5 pounds a piece. Our issue was that we wanted the guest bathroom to house the litter, but somehow prevent our dogs from going in and munching on what they must believe is a delicious brownie in a box of sprinkles.
True, I could try to put the litter box high up where your dogs couldn’t reach, but what home have you seen a litter box on top of a shelf, a fridge or a counter? Let’s be honest, we all want to house the litter box low on the floor, not high up, so it’s easy to get to scoop and sweep and after your cats have finished kicking up the litter everywhere.
An extra short gate could work where your cats can jump over it but not your small dogs, except at that point you have to step over it and I really want something that would swing open like a door.
I did try to just putting up a regular safety gate, hoping my cats could simply jump on the top bar and then into the bathroom to use the litter box – well that didn’t work as I started seeing lovely presents left on the floor right outside the gate. So then I put a stool in front of the gate for the cats to prop themselves onto before jumping on top, but then I realized they would need a stool on the other side as well in order to get back out. While my one cat would use the odd “stool-gate” system, my other wasn’t falling for it. It looked ridiculous anyway, not to mention a pain in the butt if any company was over and wanted to use the restroom.
Finally one day I realized that my smaller dogs can’t really jump that high and their bodies aren’t designed to have that upper body strength to pull themselves up through something.
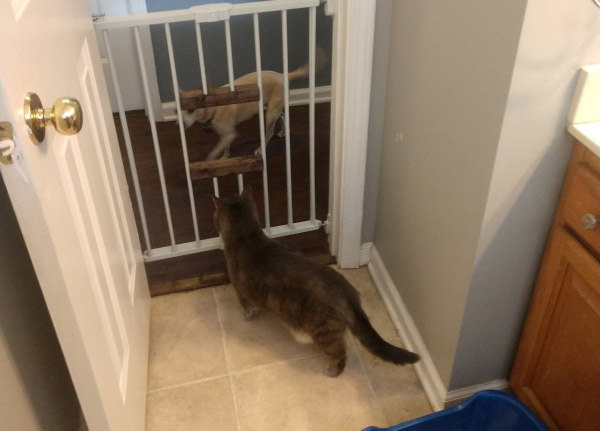
So what if I kept my tall gate and cut out my own pet opening but made it a few more inches higher off the ground? This way the cats could easily jump through the holes, babies and larger dogs won’t be able to fit through, and the small dogs would only be able to stick their heads in but wouldn’t have the strength to jump up and pull the rest of their bodies through.
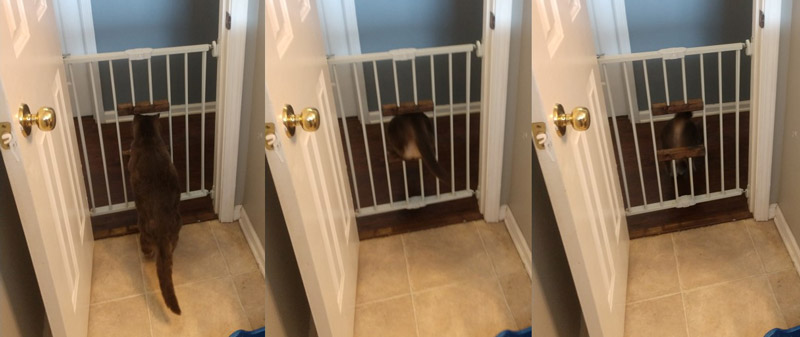
Here’s the final result:
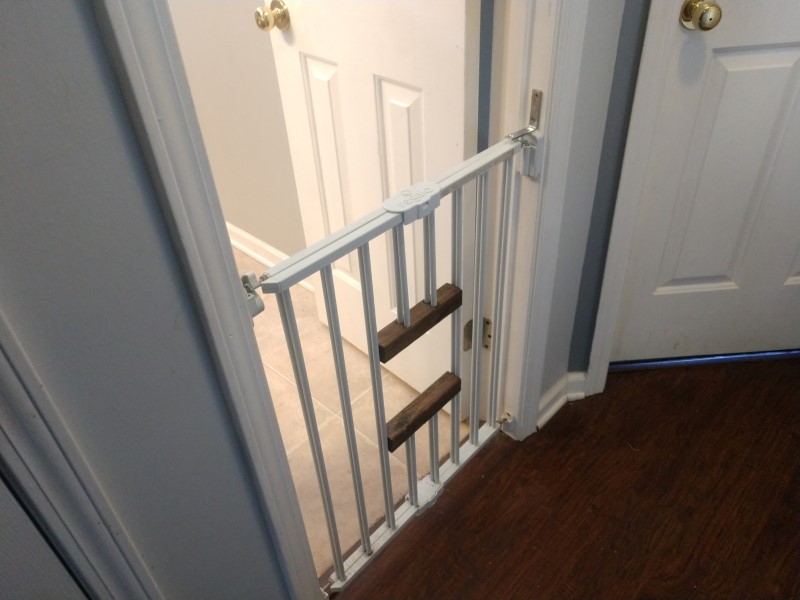
Now let me walk you through how I made it!
Baby Gate
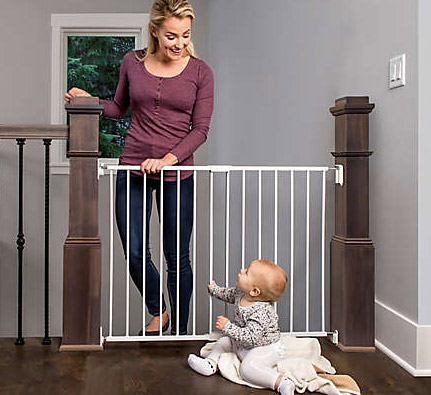
*I purchased the Regal “Top of the Stairs” baby gate from Amazon.*
It’s 29” tall and extends from 24” to 40.5” wide.
Even though I am placing the gate outside my guest bathroom door and not the stairs, I liked the fact that the gate actually screws into the wall and doesn’t just rely on the tension pressure as my cats will be putting their full weight on opening.
Tools you will need:
- Cut-off Tool (with 3” or smaller metal cut-off wheel)
- Mallet
- (TWO) 2 x 2 x 7 ¾” wood pieces
- Drill (with 3/16” drill bit)
- Wood glue
- Some sort of clamp (I used my car jack!)
Step 1: Marking Where You Will Cut
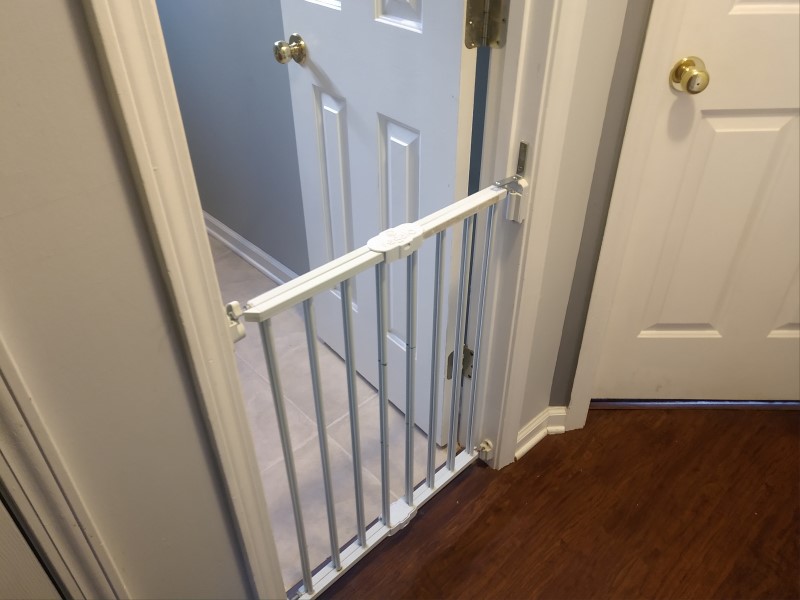
First before you do anything, you’ll want extend the width of the gate to where you want it. If any of the the poles cross over one another, you’ll want to make sure they are lined up. If you bought the same one as me, go ahead and screw the sides of the gate into the wall or door frame.
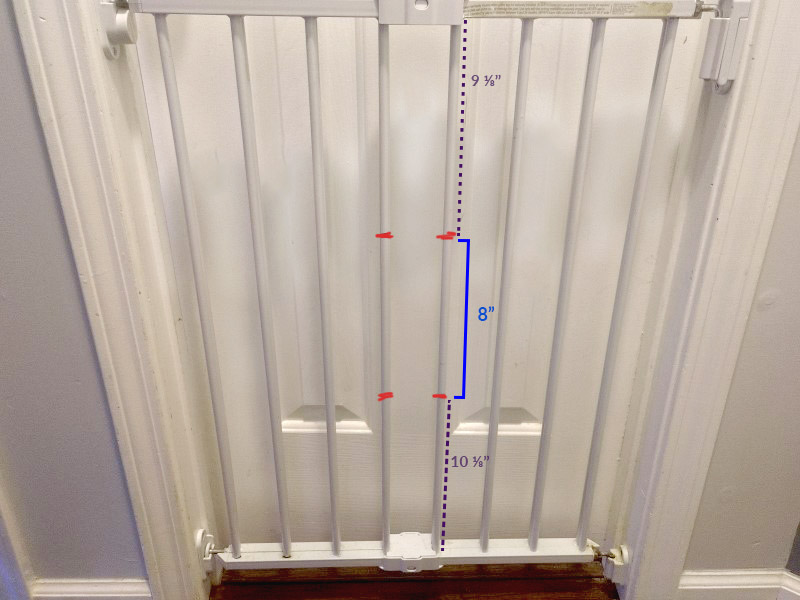 Next you will mark out where you will cut the poles. The final size of the opening will be 8” wide and 7 ¼” tall.
You will only be cutting on the center two sets of poles – that will be only two poles if the gate is fully extended or four poles (2 rows of 2 poles) otherwise.
Measure 10 ⅛” up from the bottom of the poles and make a mark with a sharpie, then measure another 8” up and make another mark.
Note: You could make your opening slightly shorter than mine if you have smaller cats compared to my big gals, but keep in mind the wood blocks will make the length ¾” shorter than where your marks are.
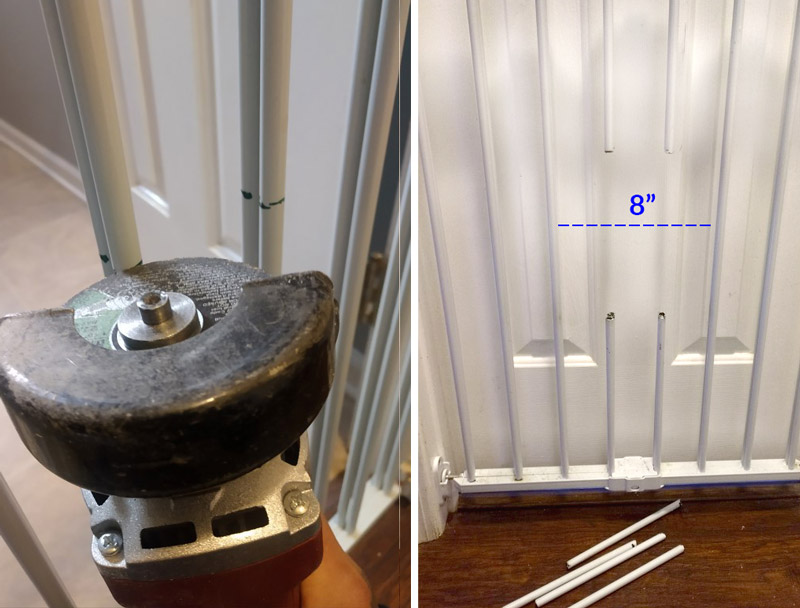
Step 2: Cutting Out the Opening
Use your cut-off tool to cut through the marked lines and then remove the disconnected poles. You may want to go back to even the bars out a bit to make sure they are all the same height. I accidentally cut some at an angle but it didn’t seem to matter as long as their endpoints line up.
Step 3: Preparing The Wood Blocks
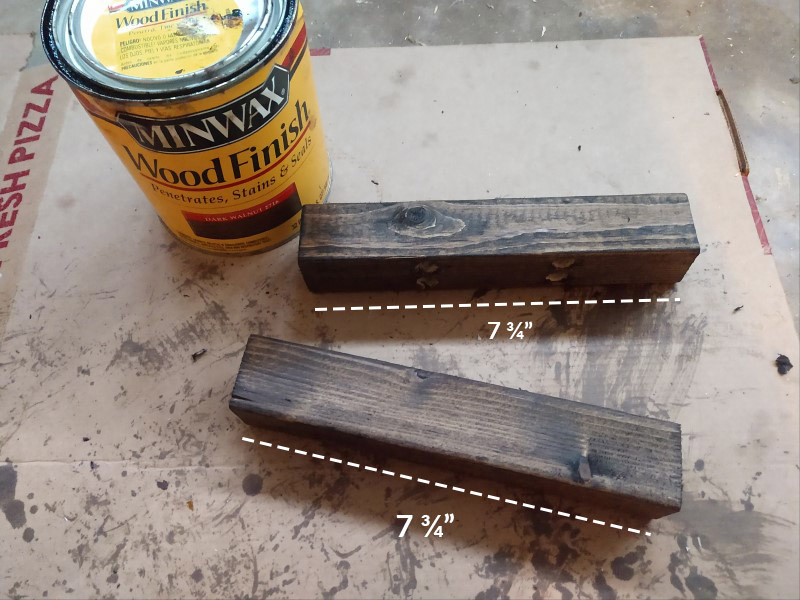
Cut two 2 x 2″ wood blocks to 7 ¾” in length.
As a design choice, I used Minwax wood finish stain to darken up the wood.
 One at a time, place a block under the top cut poles and draw a circle around each one.
 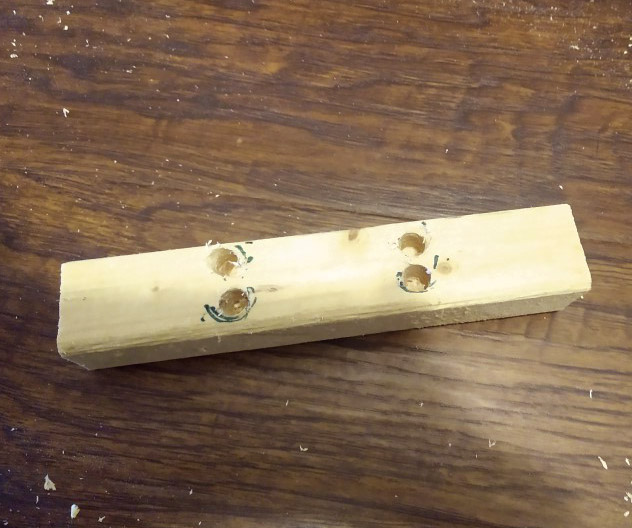 Next, drill through the center of the drawn circles using a 3/16” drill bit. You’ll want to drill pretty deep – I measured about 1 ⅛” through the wood.
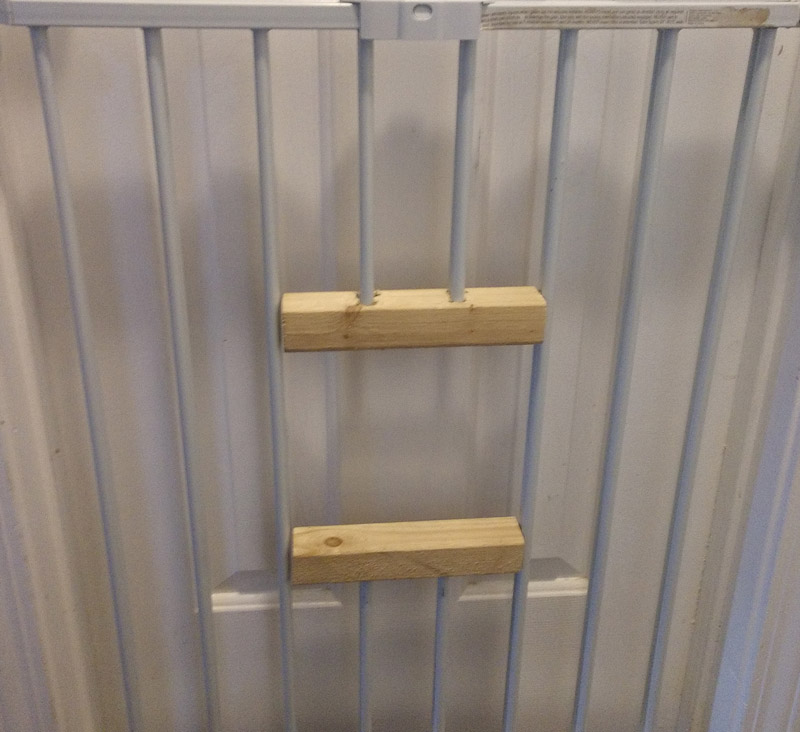 It’s very important the diameter of the holes are not too big so the poles will fit nice and snug. What’s nice is that the poles can be nudged around a bit in case a hole is slightly off.
After the holes are drilled you should be able to fit the blocks tightly on the top and bottom poles and have them stay in place.
Step 4: Glue the Blocks In!
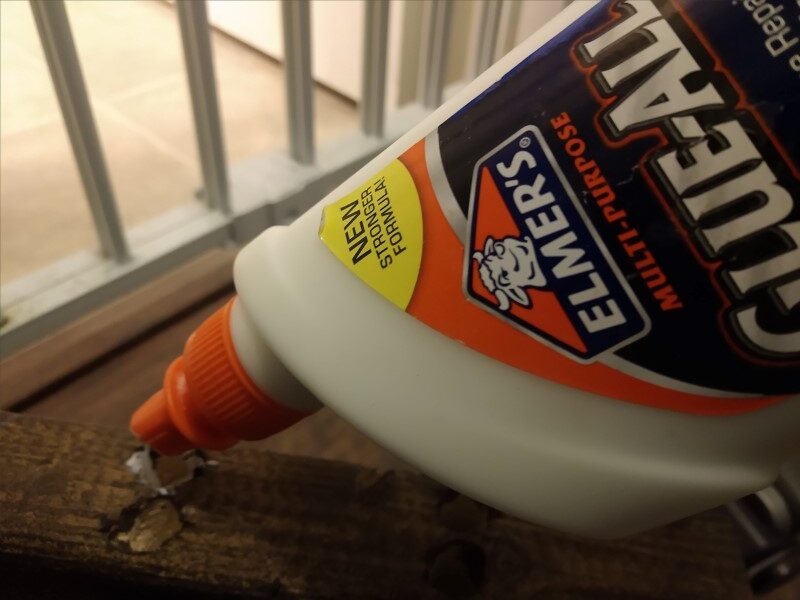
Of course to make sure they don’t eventually get loose we’re gonna glue them in. I squirted some Elmer’s Glue-All into each of the holes. When placing the blocks back on the poles, use a mallet on the wood to tap the poles more in, make sure the blocks are not just on snug but level as well.
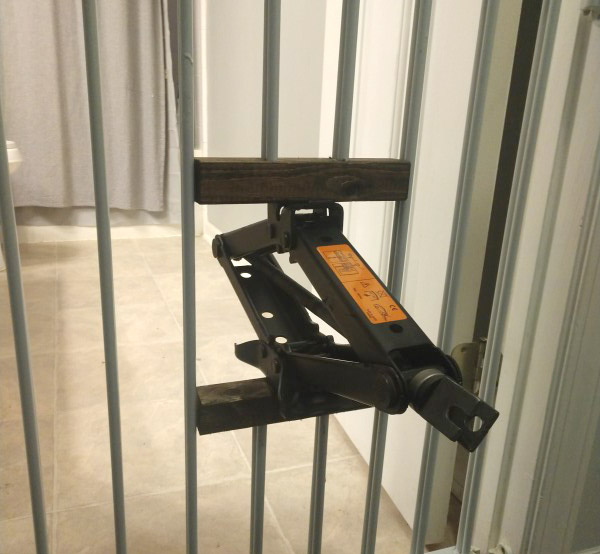 And yes, I used a car jack to keep the blocks in place as the glue dried.
You’re all done!
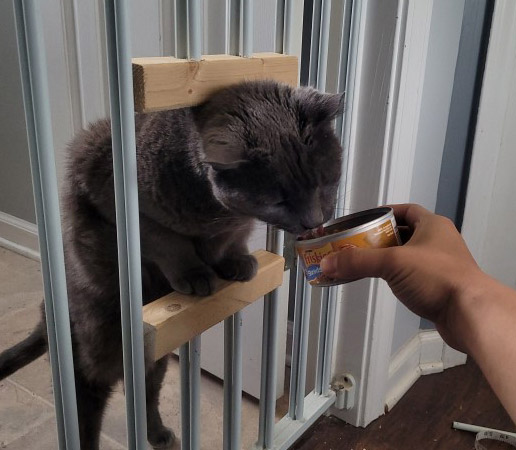 You may have to train your cats to jump through the opening as it’ll be a new concept for them. I simply lured them back forth through the hole will a can of cat food.
Not let’s see it in action!
“No kids, this is Fiona’s private time, you don’t get to come in.”
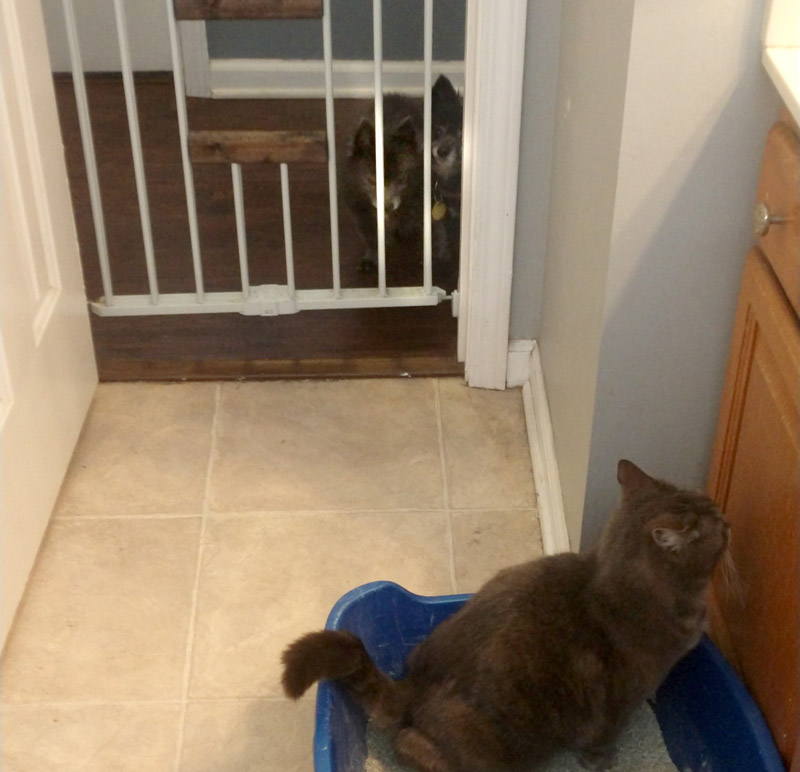
“Oh sorry, Rocko, you’re not allowed in the cat cave!”
Super cat strength!